
The FT2 Digital Mode Setup
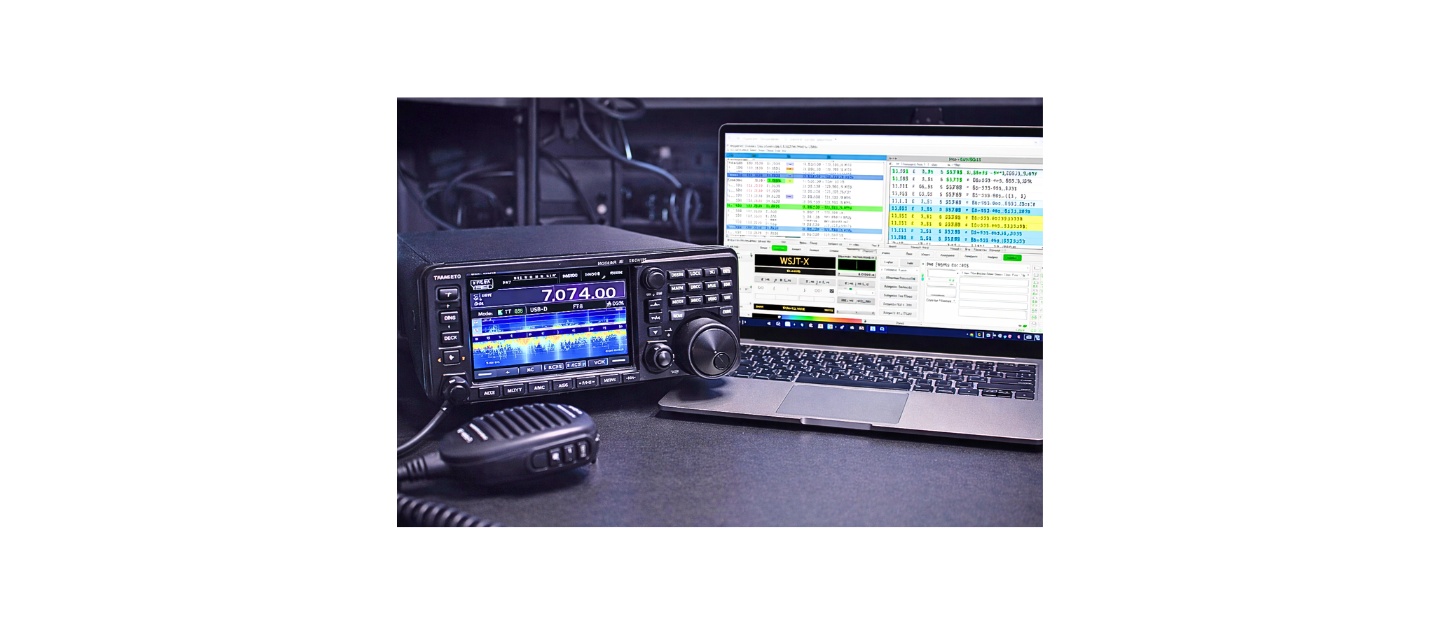
This FT2 Digital Mode Setup process is based on real-world operation using radios such as the Yaesu FT-991A and Icom IC-7300 across 20m and 40m bands under both average and weak propagation conditions. Testing included low-power operation, compromised antennas, and noisy RF environments to validate decoding reliability.
The configuration methods described here, especially audio level control, ALC management, CAT integration, and time synchronization are the same principles used in high-performance weak-signal digital operation and have been adapted specifically for FT2 with DecodeUM enhancements.
New to digital operation? Read our Complete Guide to Digital Modes.
Most Common FT2 Setup Mistakes
The majority of FT2 setup failures come from a small number of repeatable issues that prevent proper signal generation or decoding.
The most common problem is excessive transmit audio. When ALC activates, your signal becomes distorted and cannot be decoded reliably by other stations. Even small ALC movement can significantly degrade performance.
Time synchronization is another critical failure point. FT2 requires precise timing, and if your system clock is off by more than a fraction of a second, your transmissions will not align with receiving stations.
Incorrect CAT configuration can prevent the software from controlling your radio properly, leading to frequency mismatches or failed transmissions. Finally, missing or improperly installed DecodeUM files will result in weak or nonexistent decoding, even when signals are clearly visible in the waterfall.
Why Your FT2 Digital Mode Setup Is Not Working
If your FT2 digital mode setup is not working, the issue is almost always caused by one of four system failures: incorrect audio levels, poor time synchronization, CAT control misconfiguration, or missing DecodeUM integration.
When transmit audio is too high and ALC activates, your signal becomes distorted and cannot be decoded. If your system clock is not synchronized within a fraction of a second, your transmission will not align with other stations. Incorrect CAT settings prevent proper radio control, and missing DecodeUM files limit decoding performance even when signals are present.
Understanding which of these systems is failing allows you to diagnose and fix FT2 problems quickly instead of guessing.
What FT2 + DecodeUM Actually Is
FT2 in this context is not part of standard WSJT-X. It is typically included in modified builds or experimental implementations.
DecodeUM is an enhanced decoding engine that replaces or supplements the default WSJT-X decoder. Its purpose is to improve weak-signal performance and enable decoding of signals that standard builds may miss.
When installed correctly, the signal chain becomes:
WSJT-X interface → DecodeUM processing engine → decoded output
Instead of relying solely on WSJT-X’s internal decoder, the software routes incoming audio data through DecodeUM, which uses different algorithms and often deeper signal extraction techniques.
This is why those two DecodeUM files matter, they are not optional in FT2 environments that depend on them.
How FT2 Signal Flow Works (From Audio to RF)
FT2 digital mode works by converting structured data into audio tones, transmitting those tones as RF energy, and reversing the process on receive.
When you transmit, WSJT-X generates encoded audio tones that represent your message. These tones are sent through the USB audio interface into your radio, which converts them into an RF signal transmitted through your antenna.
On receive, incoming RF signals are converted into audio by the radio and sent back to the computer. DecodeUM processes this audio stream, extracts the encoded data, and reconstructs the original message for display.
This entire process depends on clean audio, accurate timing, and proper decoding. Any distortion, timing error, or misconfiguration will break the signal chain and prevent successful communication.
Complete Required Software and Files
You must have every component below before beginning. Missing any one of these will break the system.
Core software:
- WSJT-X
Support software:
- Radio USB driver (specific to your radio model)
- Meinberg NTP
DecodeUM components:
- DecodeUM executable or DLL file
- DecodeUM support/configuration file
Optional but recommended:
- Logging software (Log4OM or similar)
- GridTracker
What this setup represents:
- WSJT-X → control and interface layer
- Drivers → hardware communication layer
- DecodeUM → decoding engine layer
- NTP → timing synchronization layer
Each one serves a separate function in the system architecture.
Step 1: Install WSJT-X (Foundation Layer)
Install WSJT-X using default settings.
Do not change the installation directory unless you have a specific reason. The default path is important because DecodeUM files will be placed here later.
What this step is doing:
You are installing the primary control application that:
- Manages CAT communication
- Routes audio input/output
- Displays the waterfall
- Handles message sequencing
Even though FT2 uses DecodeUM, WSJT-X is still the main operating environment.
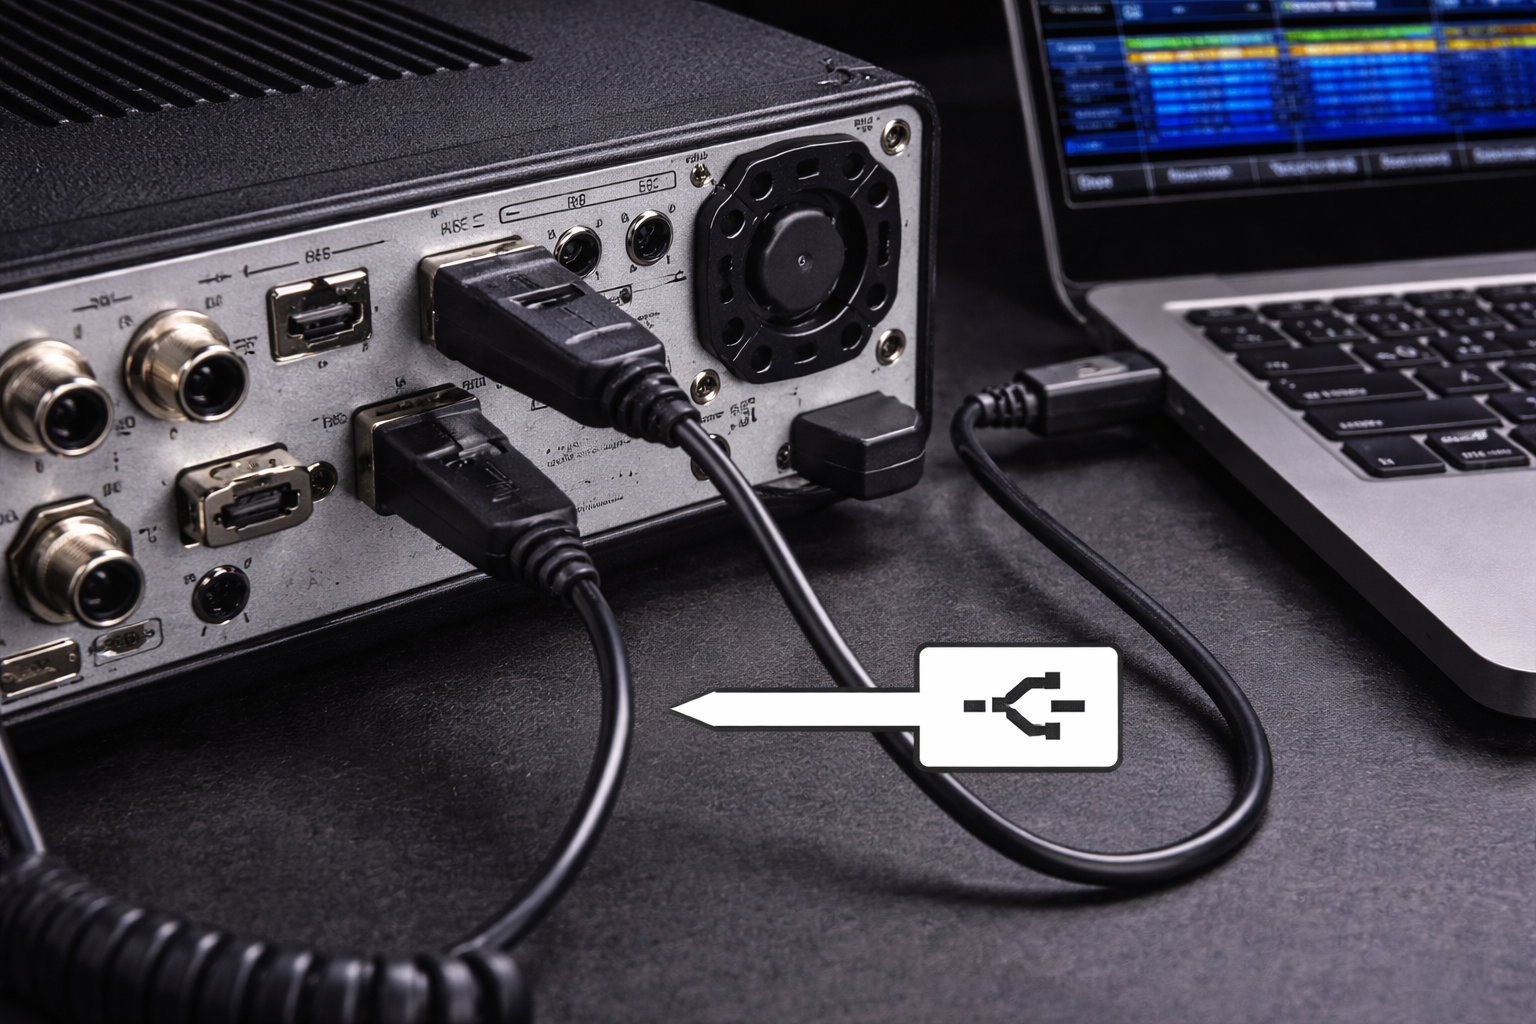
Step 2: Install Radio USB Drivers (Hardware Interface Layer)
Install the official USB driver for your radio.
After installation:
- Reboot your computer
- Connect the radio via USB
- Turn the radio ON
Now verify two things:
- A COM port appears in Device Manager
- The radio appears as an audio device
What is happening internally:
The driver creates two independent communication channels:
- Audio channel → carries signal data
- Serial (CAT) channel → carries control commands
Without this step, your computer cannot interact with your radio in any meaningful way.
Step 3: Install DecodeUM Files (Decoding Engine Layer)
This is the step most guides miss or explain poorly.
Locate your WSJT-X installation directory:
C:\Program Files\WSJT-X\
Take the two DecodeUM files you were given and copy them into this directory.
If prompted to overwrite files, only do so if your instructions specifically require it.
Restart WSJT-X after copying.
What this step is doing internally:
- You are replacing or augmenting the default decoding engine
- WSJT-X will now call DecodeUM during signal processing
- Incoming audio is routed through DecodeUM for analysis
Without this step, FT2 signals may appear but will not decode correctly.
Step 4: Install and Configure Time Synchronization (Timing Layer)
Install Meinberg NTP.
Start the service and perform an initial sync.
What this step is doing:
- Aligning your system clock with global time servers
- Maintaining sub-second accuracy required by FT2
FT2 operates in strict time slots. If your clock is off, even slightly, your transmissions will not align with other stations.
This is not optional. It is fundamental to how the mode works.
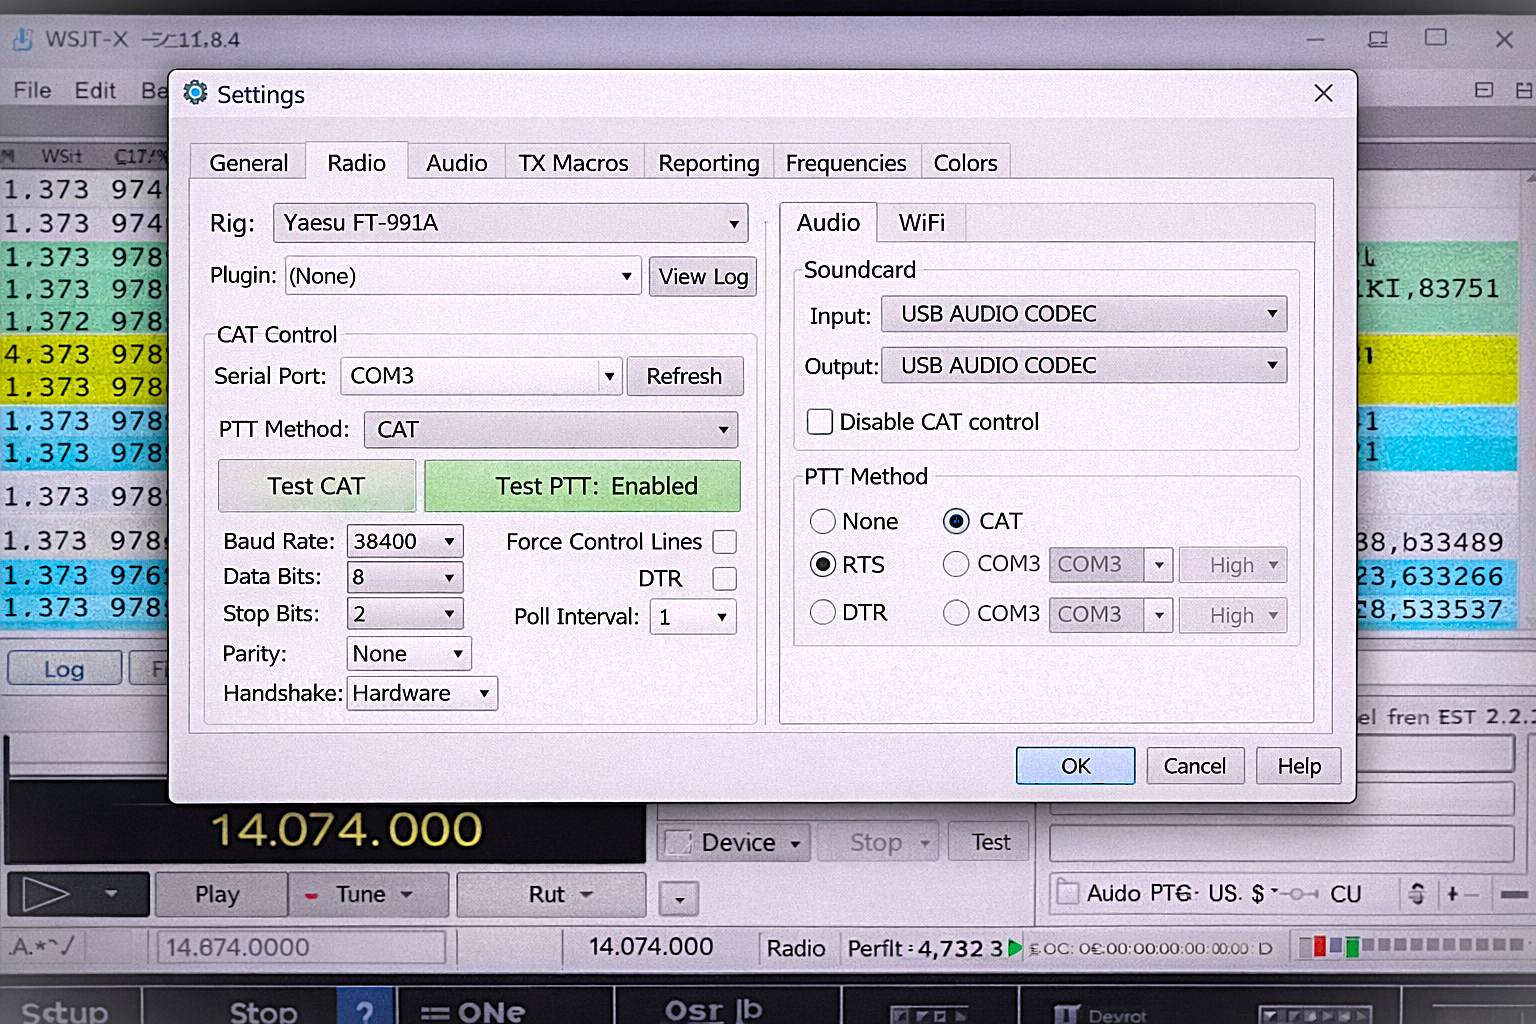
Step 5: Configure CAT Control in WSJT-X (Control Layer)
Open WSJT-X and go to Settings → Radio.
Enter your radio model, COM port, and matching baud rate.
Click “Test CAT.”
What happens during this test:
- WSJT-X sends a command through the COM port
- The radio responds with its current state
If successful, the software can now:
- Read your frequency
- Change bands
- Control transmit (PTT)
This step establishes command authority over your radio.
Step 6: Configure Audio Input (Receive Signal Path)
Go to Settings → Audio.
Select your radio as the input device.
Now observe the waterfall.
What is happening:
- RF signals are received by your antenna
- The radio converts RF into audio tones
- Those tones are sent to your computer
- DecodeUM analyzes those tones
Adjust your radio’s volume until:
- The waterfall shows clear activity
- Signals are visible but not saturated
You are feeding raw signal data into the decoding engine.
Step 7: Configure Audio Output (Transmit Signal Path)
Select your radio as the output device.
Press “Tune” in WSJT-X.
What happens:
- The software generates a steady tone
- That tone is sent to the radio as audio
- The radio converts it into RF transmission
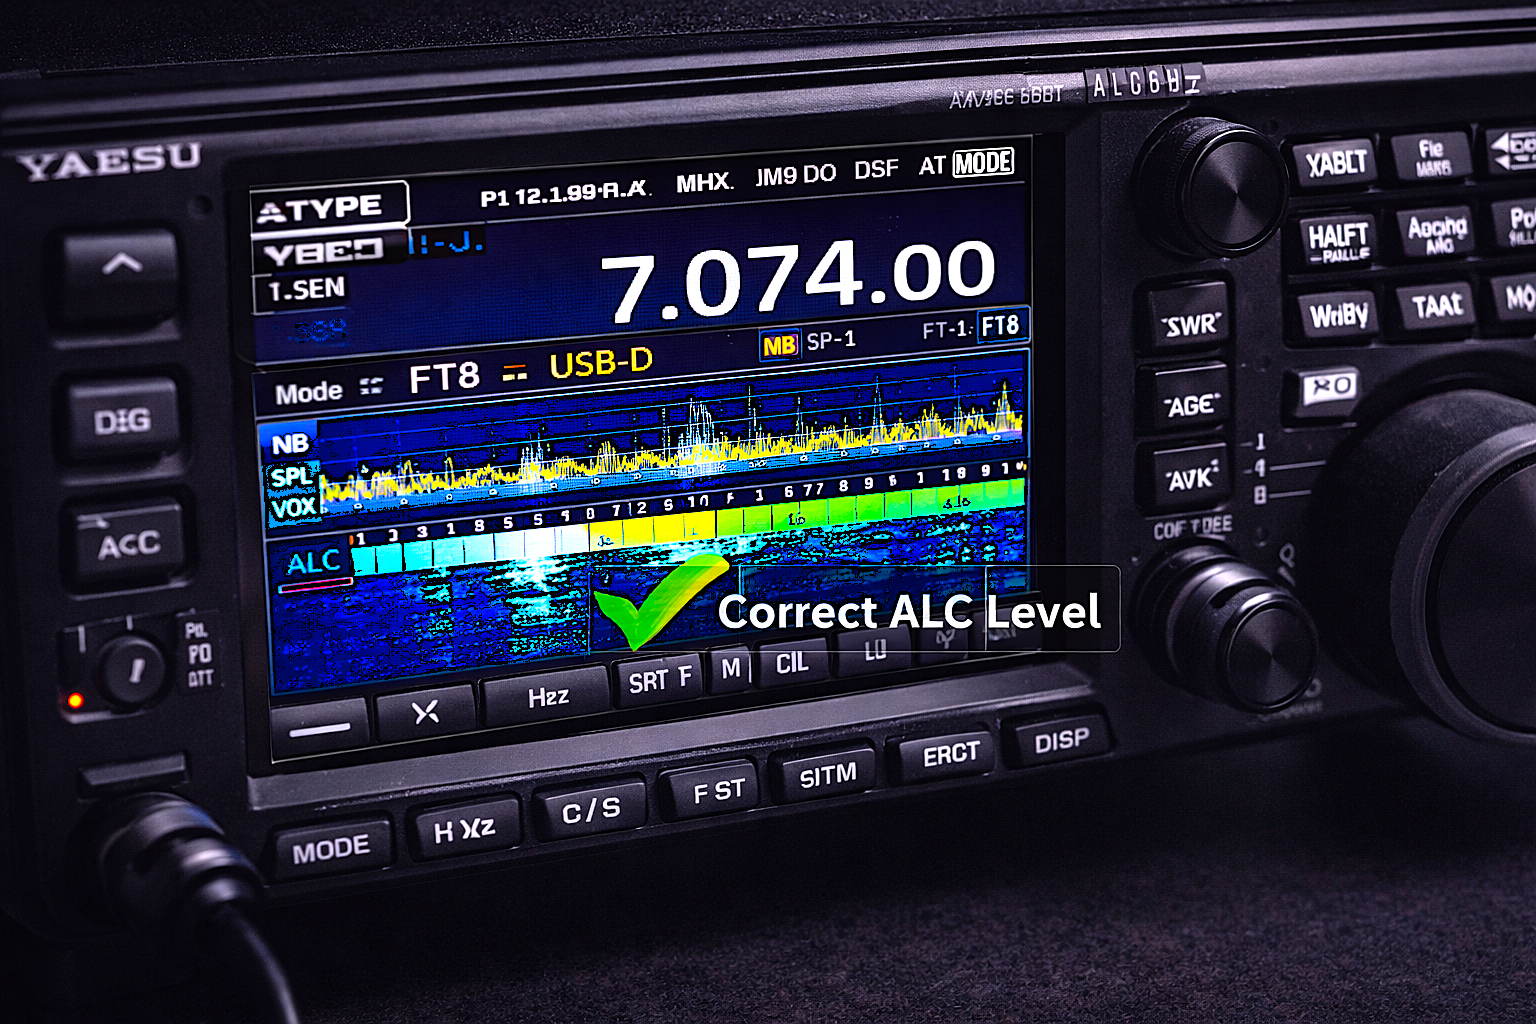
Now adjust output level carefully.
Watch your ALC meter.
Correct condition:
- ALC stays at zero or barely moves
What this step is doing:
- Controlling the amplitude of your transmitted signal
- Ensuring clean, undistorted modulation
If ALC rises, your signal becomes unreadable.
Step 8: Configure Radio Settings for Digital Operation
Set your radio to:
- USB mode
- Low power (~20 watts)
- No compression or processing
What this does:
- Ensures a clean signal path
- Prevents distortion of digital tones
Your radio is no longer acting like a voice transmitter, it is acting like a precision data modulator.
Step 9: Tune to an FT2 Operating Frequency
Set your radio to a known FT2 frequency (such as the standard digital segment around 14.074 MHz).
What is happening:
- You are tuning into a shared digital channel
- Multiple signals exist within this frequency range
WSJT-X separates signals based on audio frequency, not RF frequency.
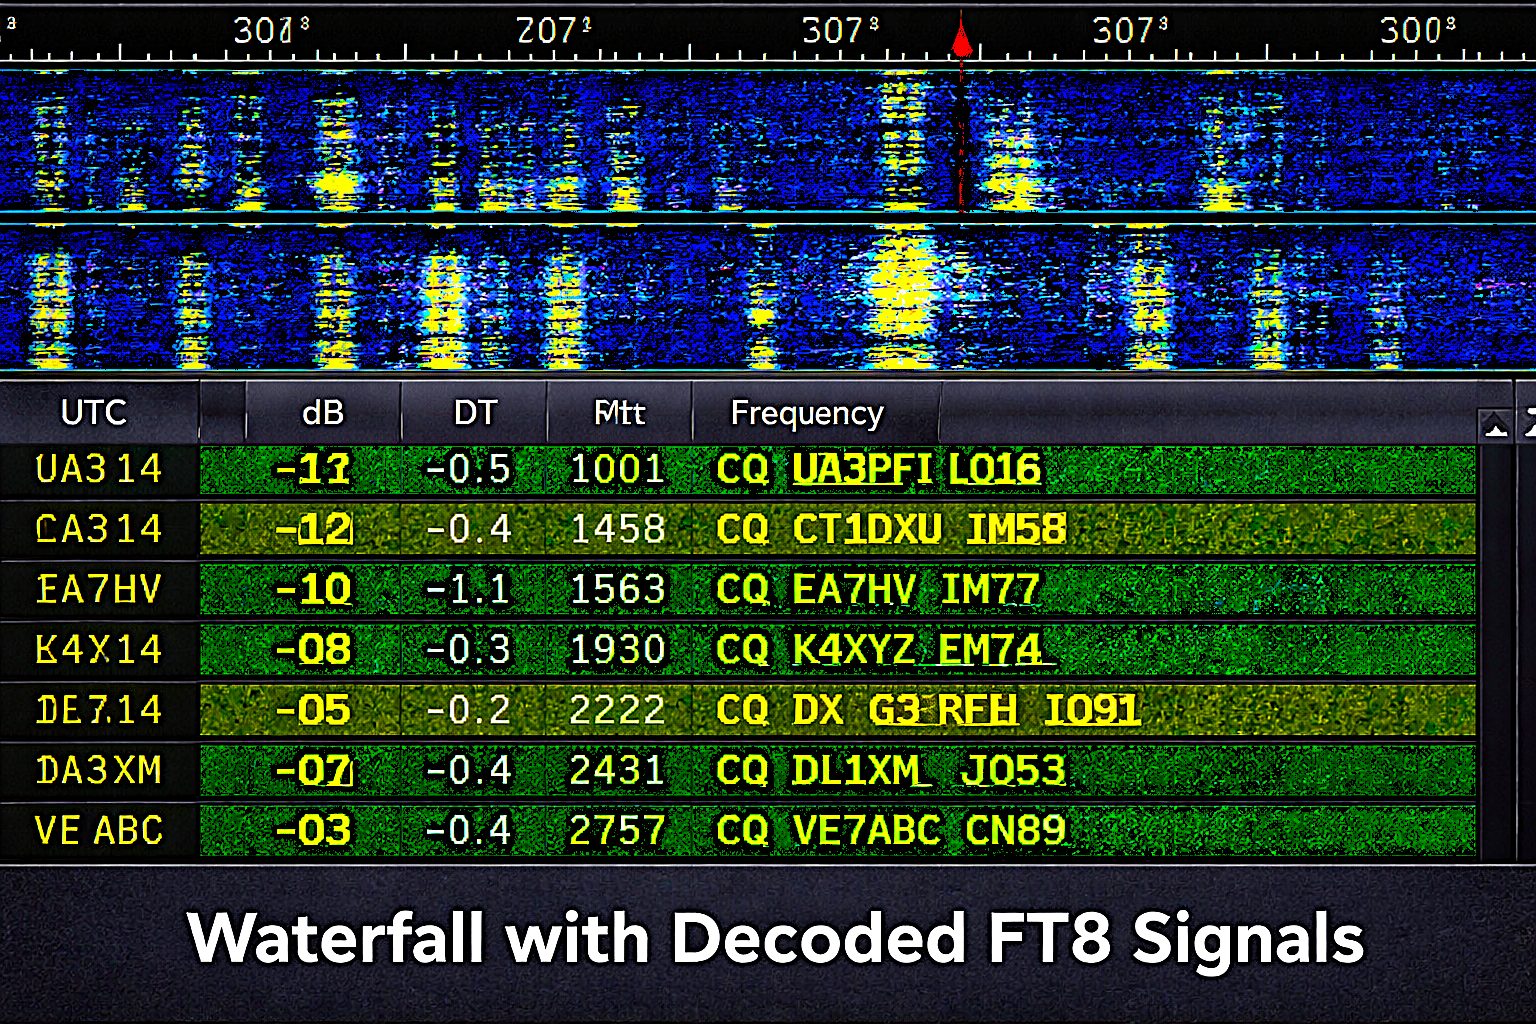
Step 10: Observe DecodeUM Operation
Watch the waterfall and decode window.
What DecodeUM is doing:
- Scanning the audio spectrum
- Identifying structured FT2 signals
- Extracting data from weak signals
You may notice:
- More decoded signals than expected
- Signals appearing below noise floor
This indicates DecodeUM is functioning correctly.
Step 11: Make Your First FT2 Contact
Double-click a CQ signal.
What happens:
- WSJT-X generates a response
- Schedules transmission in the correct time slot
- Encodes your message into audio tones
During transmit:
- Audio → radio → RF
Receiving station:
- RF → audio → DecodeUM → decoded text
The exchange continues automatically until completion.
Step 12: Log the Contact
After the QSO completes, log it.
What this does:
- Stores contact details
- Confirms successful communication
- Allows tracking for awards
Logging is part of proper operating practice.
Step 13: Optimize Performance
Now refine your system. Lower power gradually.
What this does:
- Reduces interference
- Improves signal clarity
Check ALC again.
Adjust antenna if needed to ensure efficient radiation and consistent signal output. A properly tuned antenna is critical for digital performance, especially when understanding SWR and impedance matching, because poor tuning can significantly reduce effective transmit power and decoding success.
DecodeUM allows you to work weaker signals, so efficient operation becomes more important than raw power.
Step 14: Troubleshooting by System Layer
Use system logic to diagnose problems.
- No decoding → audio input issue
- No transmit → audio output or CAT issue
- No responses → time sync or distortion
- Wrong frequency → CAT configuration
- Weak decoding → DecodeUM not installed correctly
- Each issue corresponds to a specific layer in your setup.
Step 15: Operating Efficiently
- Operate with discipline.
- Choose clear frequencies in the waterfall.
- Respond quickly to CQ calls.
- Use propagation knowledge to select bands.
- DecodeUM gives you an advantage—use it to work stations others cannot.
FT2 with DecodeUM is a structured, multi-layer system. You configured:
- Software control (WSJT-X)
- Hardware interface (drivers)
- Signal routing (audio)
- Time synchronization (NTP)
- Decoding engine (DecodeUM)
Each layer serves a specific purpose. When all are aligned, FT2 becomes extremely powerful and reliable.
This is not just a setup, it is a system you now understand completely.
Final Setup Checklist
A properly functioning FT2 digital mode setup depends on four systems working together: clean audio input and output, accurate time synchronization, correct CAT control, and properly installed DecodeUM files.
Before operating, confirm that your ALC shows little to no movement during transmission, your system clock is synchronized within half a second, your radio responds correctly to CAT commands, and your software is consistently decoding signals in the waterfall.
When all four systems are aligned, FT2 becomes a highly reliable weak-signal communication mode capable of making contacts under challenging conditions.
Conclusion
FT2 digital mode setup is not difficult once each system is correctly configured, but it is extremely sensitive to errors in audio levels, timing, and control. Most failures come from small misconfigurations that break the signal chain rather than major equipment problems.
By ensuring clean transmit audio with no ALC movement, maintaining accurate time synchronization, confirming reliable CAT control, and properly installing DecodeUM, you create a system that operates consistently and efficiently.
When these elements are aligned, FT2 becomes a powerful weak-signal mode capable of making reliable contacts under conditions where many other modes fail.
FAQ
What are the DecodeUM files used for
They replace or enhance the default decoding engine, allowing improved weak-signal decoding and FT2 compatibility.
Can FT2 work without DecodeUM
Most experimental FT2 implementations require DecodeUM. Standard WSJT-X does not support these modes natively.
Why is time synchronization required
FT2 uses strict transmission timing. Without accurate time, signals will not align and cannot be decoded.
How do I know DecodeUM is working
You will see increased decoding sensitivity and more weak signals appearing in the decode window.
What is the most critical adjustment
Transmit audio level. Keeping ALC at zero ensures a clean signal.
Why am I not getting responses
The most common causes are incorrect time sync or overdriven audio causing signal distortion.
About the Author
Vince, W2KU, is a licensed Extra class amateur radio operator and the founder of Ham Shack Reviews. He was named Amateur of the Year in 2026 for contributions to practical amateur radio education and equipment evaluation.
He knows propagation very well, operates mAobile and handhelds daily. Vince exchanges QSL cards for DXCC, contest confirmation, and award tracking and is the club QSL manager. His guidance focuses on practical operating procedures, accurate logging, and real-world amateur radio practices.
Please consider Donating to help support this channel