Installing Power Pole connectors is an essential skill for any ham radio operator or electronics hobbyist who wants reliable and secure power connections. These connectors are widely used in amateur radio setups because they provide standardized, low-resistance connections that can handle high current loads efficiently.
Moreover, learning how to install Power Pole connectors properly ensures consistent performance, minimizes power loss, and reduces the risk of accidental disconnections or shorts.
Understanding Power Pole Connectors
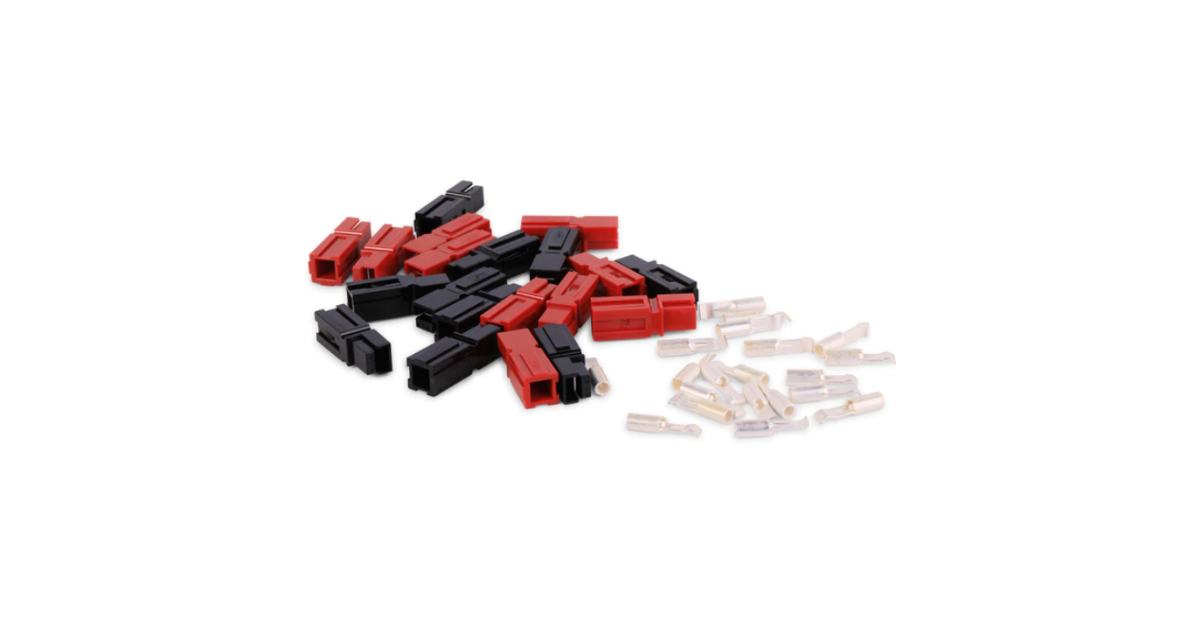
Power Pole connectors are modular, genderless power connectors that snap together to create secure electrical joins. Each connector typically consists of a red and black housing representing positive and negative polarity.
Inside each housing, a metal contact carries the current and provides a secure mating surface. Because the housings are stackable, operators can easily create custom connector configurations. Additionally, the connectors are rated for various current capacities such as 15, 30, or 45 amps, depending on the type of metal contact used.
Preparing the Wire for Installation
Before beginning the installation, cut the wire to the proper length and strip about a quarter-inch of insulation from the end. It is important to ensure that no stray strands of wire remain outside the terminal area since those can cause shorts or poor conductivity.
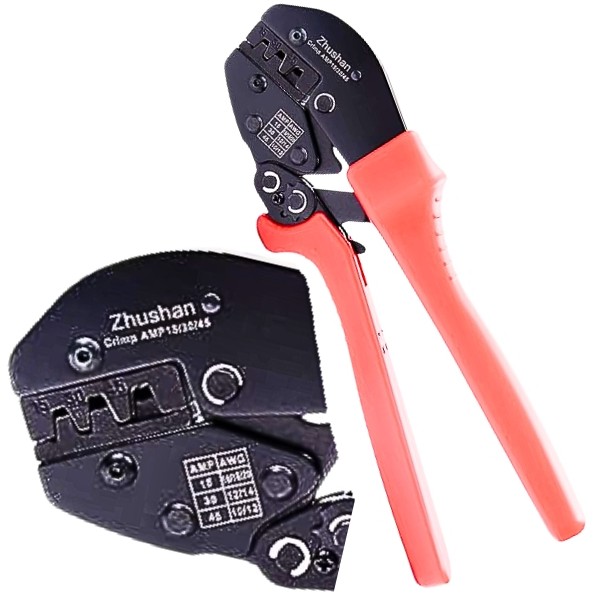
Always use a sharp wire stripper for a clean cut and avoid nicking the wire, as that can weaken it and lead to future breaks. Next, decide whether you will crimp or solder the connectors. Crimping provides a quick and strong bond when done with the correct crimping tool, while soldering can offer a more permanent, vibration-resistant connection when done properly.

Attaching the Metal Contacts
Slide the stripped wire into the metal contact until the copper strands are fully seated. If using a crimping tool, align the contact correctly in the die and squeeze firmly until you achieve a tight crimp with no movement of the wire.
On the other hand, if soldering, heat the metal barrel evenly and apply solder until it flows around the strands without creating a cold joint. The contact should appear shiny, smooth, and filled without excess solder. After cooling, inspect the joint carefully. A solid connection will not pull loose when gently tugged.
Inserting Contacts into the Housings
Once the contacts are attached, insert them into the red and black housings. The contacts have a spring tab that clicks into place when seated correctly, ensuring that they will not back out under tension.
The red housing always represents positive, while black designates negative. Align both housings with the tongue up and the hood down in the standard amateur radio configuration. Push until you hear or feel the snap, confirming that the connectors are locked securely in place. This orientation ensures compatibility with all other Power Pole-equipped devices in your shack.
Testing the Connection
After installation, it is crucial to test continuity and polarity before using the connector in a live circuit. Connect a multimeter to verify that the positive and negative leads are not reversed and that resistance through the connector is minimal. Power Poles are known for low resistance, typically under a few milliohms when properly installed.
If you detect a high resistance or intermittent reading, recheck the crimp or solder joint. Occasionally, a misaligned contact or debris in the housing can cause poor performance, so inspect and clean if necessary.
Avoiding Common Mistakes
Many beginners accidentally reverse polarity or fail to seat the contacts fully. This can lead to system failure or even equipment damage. Always double-check the red-to-black orientation and confirm the housings are locked together before connecting to power.
Additionally, using undersized wire or incorrect contact ratings can lead to overheating and voltage drops. Choose 30-amp contacts for most radio power cords, and use 12 to 14 AWG wire for best results. Another common mistake is neglecting to support the wire mechanically; use strain relief or heat shrink tubing to prevent flexing near the connector.
Maintaining and Using Power Pole Connectors
Once installed, Power Pole connectors require very little maintenance. However, periodic inspection ensures longevity. Dust or oxidation can build up on contacts over time, especially in mobile environments. A quick cleaning with contact cleaner or isopropyl alcohol keeps conductivity optimal.
Over time, if the spring tension weakens, the contact can be replaced without discarding the housing. Because the housings are modular, you can expand your setup easily by adding additional connectors for power distribution panels, chargers, or mobile rigs.
Benefits of Using Power Pole Connectors
Using Power Pole connectors simplifies radio setups, eliminates polarity errors, and standardizes equipment connections. They also allow quick swapping of devices between mobile and base stations without rewiring. Additionally, because they are genderless, there’s no confusion over which end connects where.
The compact design conserves space while the rugged materials withstand high currents and vibration. Whether installing them on a base station power supply or portable battery pack, Power Poles offer unmatched convenience and reliability.
Conclusion
Installing Power Pole connectors correctly guarantees consistent electrical performance and safer power distribution for amateur radio and electronic projects. By preparing wires carefully, making strong crimps or solder joints, and ensuring proper orientation, you can achieve a professional-grade installation.
As a result, your equipment will benefit from clean power delivery and long-lasting, dependable connections that stand up to repeated use. With practice and attention to detail, every operator can master the art of installing Power Pole connectors efficiently and confidently.
Please consider Donating to help support this channel
